How To Get Algae Out Of Rabbit Water Bottle? (6 Steps & 4 Tips)
To remove algae from your rabbit’s water bottle, use a brush or pipe cleaner to scrub the inside with soapy water. Rinse thoroughly, ensuring no soap residue remains. For stubborn algae, mix a solution of equal parts water and vinegar, let it sit for 15 minutes, and then scrub again. Rinse well before refilling with fresh water.
Keeping your rabbit’s water bottle clean is essential for their health and well-being. Algae growth in the water bottle can be a common issue, posing potential health risks for your furry friend.
In this guide, we’ll provide you with practical tips and steps on how to get algae out of rabbit water bottles. Follow these guidelines to ensure a clean and healthy water source for your beloved pet.
Identifying the Algae Issue
Notice greenish water or floating particles? Is your rabbit avoiding the bottle? These are signs of algae. Act swiftly, as identifying the issue early ensures a healthier water source for your furry friend.
Algae in a rabbit water bottle can pose health risks to your furry friend. Recognizing the signs and identifying the issue is the first step in resolving it.
1. Recognizing Algae Growth
Spotting algae growth in your rabbit’s water bottle is crucial to maintaining their health. Actively observe the water for any greenish tint or floating particles.
If you notice discoloration, it’s a clear sign of algae presence. Keep an eye on the bottle’s interior – algae often cling to surfaces. Don’t overlook any unusual changes.
2. Assessing Rabbit Behavior
When it comes to ensuring your rabbit’s well-being, understanding their behavior is key. Watch out for clear signs that indicate potential issues with the water bottle:
- Observation: Pay attention to how frequently your rabbit approaches the water bottle.
- Reluctance to Drink: If your rabbit hesitates or shows disinterest in drinking, it may signal a problem.
- Unusual Behavior: Keep an eye out for any sudden changes in your rabbit’s behavior, such as lethargy or discomfort.
- Physical Symptoms: Check for physical symptoms like weight loss or changes in fur quality, which may be linked to water-related concerns.
Importance of Regular Cleaning
Maintaining a clean rabbit water bottle is crucial for your furry friend’s health and well-being. Regular cleaning not only ensures a fresh water supply but also prevents potential health issues.
Here’s why regular cleaning is essential:
- Prevents Algae Buildup: Regular cleaning eliminates the conditions that lead to algae growth, keeping the water bottle clean and clear.
- Avoids Bacterial Contamination: Cleaning removes bacteria that can thrive in stagnant water, safeguarding your rabbit from infections.
- Encourages Hydration: A clean water bottle encourages your rabbit to drink more, promoting proper hydration for overall health.
- Extends Bottle Lifespan: Regular maintenance prevents the build-up of grime and extends the lifespan of the water bottle, saving you money in the long run.
How to Get Algae Out of Rabbit Water Bottle? – 6 Steps Process
Ensure your furry friend stays healthy by taking proactive steps to remove algae from their water bottle. Empty the bottle, scrub it with a brush, sterilize using vinegar, and let it air dry.
This simple 6 (six) steps process guarantees a clean water source for your rabbit.
Step 1: Emptying the Water Bottle
Begin the algae-busting process by completely draining the rabbit’s water bottle. Pour out any remaining water, ensuring you start with a fresh slate.
This step is crucial to rid the bottle of any existing algae and prepare it for a thorough cleaning. Take a moment to inspect the water for any visible signs of discoloration or floating particles.
Step 2: Disassembling the Water Bottle
Now, let’s roll up our sleeves and get hands-on. Disassembling the water bottle is a crucial step in banishing algae. Begin by taking apart every piece – the nozzle, cap, and any removable components.
This ensures a thorough cleaning, leaving no room for hidden algae to linger. As you dismantle, pay attention to any crevices or corners where algae might try to sneak away.
Step 3: Scrubbing with a Bottle Brush
Now, let’s roll up our sleeves and tackle those algae spots head-on. Grab a bottle brush – the hero in our mission for a clean rabbit water bottle. With a firm grip, scrub the inside of the bottle, focusing on areas where algae are playing hide-and-seek.
The bristles of the brush power through, dislodging and banishing algae in one sweep. Ensure you reach every nook and cranny, including the nozzle – algae’s favorite hideout.
This active scrubbing action guarantees a thorough cleanse, leaving your rabbit’s water bottle gleaming and free from any green invaders. Get ready to witness the transformation as your bottle brush works its magic!
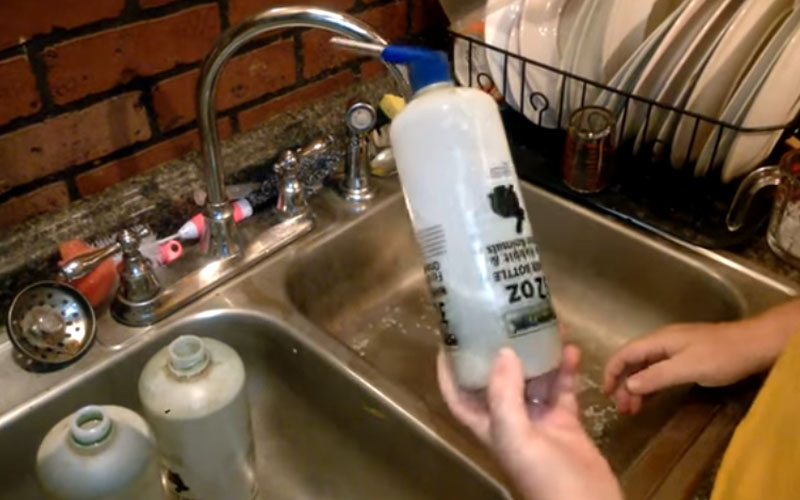
Step 4: Rinsing Thoroughly
Now that you’ve scrubbed away the algae, it’s time to ensure a squeaky-clean water bottle for your rabbit. Rinse the bottle and all its parts under a steady stream of water.
Make certain to remove any soap or cleaning residue completely. Hold the bottle upside down to allow thorough drainage.
This step is crucial to eliminate any lingering traces of algae and cleaning agents, guaranteeing your rabbit gets nothing but fresh, pure water. A good rinse sets the stage for a healthier water bottle and a happier bunny.
Step 5: Sterilizing with Vinegar
After scrubbing away visible algae, it’s time to sterilize your rabbit’s water bottle effectively. Grab a common kitchen staple – white vinegar. Mix equal parts water and vinegar, creating a potent yet pet-safe solution.
Let the water bottle soak in this solution for a few hours. The vinegar works as a natural disinfectant, eliminating any remaining algae or harmful bacteria. This step ensures a thoroughly sanitized water bottle, promoting your rabbit’s health.
Step 6: Drying Completely
After sterilizing the water bottle with the vinegar solution, it’s crucial to let it air dry thoroughly. This step ensures that any remaining moisture evaporates, preventing the growth of new algae.
Place the disassembled parts in a well-ventilated area, allowing them to dry naturally. Ensure there are no damp spots left before reassembling the bottle.
This active drying process plays a vital role in maintaining a hygienic water bottle for your rabbit, promoting a clean and safe drinking environment.
A completely dry bottle reduces the risk of recontamination, keeping your furry friend’s water supply fresh and algae-free.
Preventive Measures for Algae-Free Water Bottle
Regularly inspect your rabbit’s water bottle, place it in sunlight for natural disinfection, and establish a consistent cleaning routine. These actions thwart algae growth, ensuring a clean water source for your furry friends.
1. Regular Inspections
- Frequent Checks: Conduct regular visual inspections of the rabbit water bottle to catch any signs of algae growth early on.
- Visible Contamination: Look for any greenish tint, slimy residue, or floating particles in the water, indicating potential algae presence.
- Immediate Action: If algae are detected, take swift action by initiating the cleaning process outlined in our guide to prevent further contamination.
- Hands-On Approach: Physically handle the water bottle, feeling for any unusual textures or sliminess, which might signal the onset of algae buildup.
- Preventive Vigilance: Even in the absence of visible algae, adhere to a consistent inspection routine to proactively address any potential issues before they compromise the water quality for your rabbits.
2. Sunlight Exposure
Place your rabbit’s water bottle in a spot with some sunlight. Sunlight helps stop algae growth, keeping your pet’s water clean and fresh.
The natural light acts as a powerful deterrent, creating an environment less friendly for algae to thrive. This simple step not only enhances the cleanliness of the water but also contributes to the overall health of your rabbits.
Choose a location with ample sunlight exposure, and watch as this easy yet effective method becomes a key part of maintaining a hygienic water source for your furry friends.
3. UV-Protected Water Bottles
Investing in a UV-protected water bottle is a game-changer for maintaining your rabbit’s hydration health. These specially designed bottles act as a shield against harmful sunlight, preventing the growth of unsightly and potentially harmful algae.
By blocking out the sun’s rays, these bottles create an environment less conducive to algae multiplication. Upgrade to UV-protected bottles for a proactive solution, ensuring your furry friend enjoys consistently clean and algae-free water.
It’s a simple yet effective way to safeguard your rabbit’s well-being with minimal effort on your part.
4. Monitoring Water Quality
Keep a close eye on your rabbit’s water quality to ensure their health. Regularly inspect the water in the bottle for any changes. If you notice a strange color, an unusual smell, or floating debris, take action immediately.
Algae can multiply swiftly, leading to potential health risks for your pet. You can keep your pet’s water source clean and safe by remaining watchful and resolving any issues as soon as they arise.
Regular checks are the key to preventing algae-related problems and ensuring your rabbit always has access to fresh, healthy water.
FAQ
Algae can be harmful to your rabbit. Certain types of algae produce toxins that can cause digestive issues, neurological problems, or even be fatal for your furry friend. It’s crucial to prevent your rabbit from consuming any algae, especially in areas with stagnant water.
Clean your water bottle regularly, ideally every day, to ensure it stays hygienic. Wash it with mild soap and warm water, paying attention to the cap and any crevices. This prevents the buildup of bacteria and odors, keeping your hydration source fresh and safe for daily use.
If the algae stick around even after cleaning, try re-cleaning the affected area using a stronger solution or scrubbing more vigorously. Ensure you remove all traces of the algae to prevent regrowth. Consider improving ventilation and reducing moisture to create an inhospitable environment for algae.
To prevent algae growth, regularly clean and scrub surfaces exposed to sunlight and moisture. Ensure proper circulation and aeration in water bodies, and use algae-killing additives if needed. Limit nutrient-rich runoff into water sources, by reducing fertilizer use. These straightforward actions help maintain a clean environment and discourage algae from thriving.